基于nodejs环境用Phaser来制作一个html5游戏
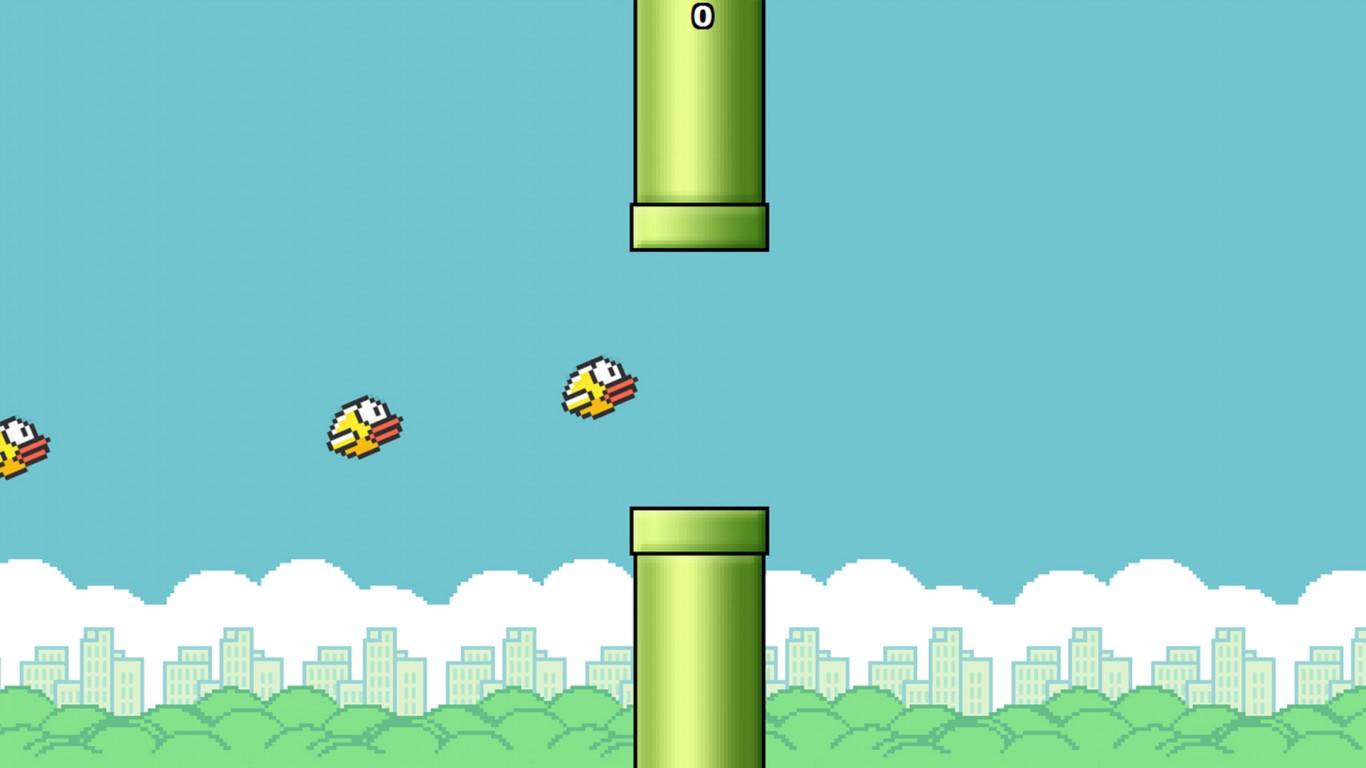
最近对html5小游戏有点感兴趣,就在网上搜罗了一些教程,自己学着实现了简单的flappybird。效果如下图:
.gif)
.png)
.gif)
今天就跟大家简单介绍下我的实现,相应代码已放置本人github,下面步骤所涉及到的资源素材皆在代码里面。
1、创建node项目 游戏主要是有js来控制实现的,是要靠服务器运行的,这边我就选择了node环境,所以最开始需要先创建node项目,这里就不详细介绍,若是不会的可以参照如何创建nodejs项目?。
2、添加游戏相关空架子 创建完node项目之后,就需要我们在这个框架结构编写游戏了,首先我们需要建与游戏编码相关的一个空架子,目录结构如下:
.png)
我们需要编辑的就是views/index.ejs(相当于index.html,主页入口),public/images(游戏图片),public/Javascripts(游戏相关js,main.js就是主要编辑的js,phaser.min.js就是游戏基于的技术实现)
3、初始化 修改node项目主文件index.ejs,引入phaser和main.js
<!DOCTYPE html>
<html>
<head>
  <meta charset="utf-8" />
  <title> Flappy Bird Clone </title>
  <script type="text/javascript" src="/javascripts/phaser.min.js"></script>
  <script type="text/javascript" src="/javascripts/main.js"></script>
</head>

<body>
</body>
</html>
4、游戏场景实例化 接下来就需要我们编辑各种游戏场景了,控制整个游戏的流程个运行,这里就需要在mainjs里面实现了,依赖于phaser的技术,这里就不仔细介绍phaser,若有不懂可查看官方文档,或者看这里。 首先这边设定的是四种游戏场景:加载动画(bootState)、预加载(preloadState)、菜单(menuState)、游戏(mainState)
这里用到的就是phaser的state
首先根据设计的四种场景,搭建main.js的空架子,实例化一个game,如下:
//加载动画
var bootState = {};
//预加载
var preloadState = {};
//菜单
var menuState = {};
//游戏
var mainState = {};

//实例化游戏
var game = new Phaser.Game(285, 490);


//把定义好的场景添加到游戏中
game.state.add('boot', bootState);
game.state.add('preload', preloadState);
game.state.add('menu', menuState);
game.state.add('main', mainState);

//调用boot场景来启动游戏
game.state.start('boot');
5、加载动画 我们设定游戏最开始就是加载动画,这边有个小问题,就是这里的gif动画运行不起来,这块暂时没有去优化,所以大家也可以看着办,这块也是可有可无,可根据自己喜好添加,若不想要这一块,将初始运行改为预加载的模块即可,代码如下:
var bootState = {
    preload:function () {
        game.load.image('loading','/images/flappybird/loading0.gif'); //加载进度条图片资源
    },
    create: function () {
        game.state.start('preload'); //加载完成后,调用preload场景
    }
};
6、调用preload场景 游戏所需要用到的所有资源全都在这里进行加载,代码如下:
var preloadState = {
    preload : function(){
        var preloadSprite = game.add.sprite(0,0,'loading'); //创建显示loading进度的sprite
        game.load.setPreloadSprite(preloadSprite);  //用setPreloadSprite方法来实现动态进度条的效果

        //以下为要加载的资源
        game.load.image('background','/images/flappybird/bg_day.png'); //游戏背景图
        game.load.image('ground','/images/flappybird/land.png'); //地面
        game.load.image('title','/images/flappybird/title.png'); //游戏标题
        game.load.image('bird', '/images/Flappy-bird.png');//小鸟
        game.load.image('btn','/images/flappybird/button_play.png');  //按钮
        game.load.image('pipe', '/images/pipe.png');//管道

        game.load.audio('jump', '/images/jump.wav');

        game.load.image('ready_text','/images/flappybird/text_ready.png'); //get ready图片
        game.load.image('play_tip','/images/flappybird/tutorial.png'); //玩法提示图片
        game.load.image('game_over','/images/flappybird/text_game_over.png'); //gameover图片
        game.load.image('score_board','/images/flappybird/score_panel.png'); //得分板
    },
    create : function(){
        game.state.start('menu'); //当以上所有资源都加载完成后就可以进入menu游戏菜单场景了
    }
};
7、进入菜单场景
加载完资源就开始进入游戏的菜单页面了,从这里开始就是整个游戏的展示主体了。
菜单有四个部分:背景、地板、标题组(包含标题和小鸟)和按钮(游戏开始入口)
实现效果如图:
.gif)
实现原理: (1)背景和地面:我们看到这两个东西是会动的,地面移动动的速度快一些,背景图慢一些,在Phaser中有专门的东西来处理这种效果,叫做TileSprite,什么是TileSprite呢?TileSprite本质上还是一个sprite对象,不过这个sprite的贴图是可以移动的,并且会自动平铺来弥补移动后的空缺,所以我们的素材图片要是平铺后看不出有缝隙,就可以拿来当做TileSprite的移动贴图了。TileSprite的贴图既可以水平移动也可以垂直移动,或者两者同时移动,我们只需要调用TileSprite对象的autoScroll(x,y)方法就可以使它的贴图动起来了,其中x是水平方向的速度,y是垂直方向的速度。
var menuState = {
    create:function () {
        game.add.tileSprite(0,0,game.width,game.height,'background').autoScroll(-10,0); //背景图
        game.add.tileSprite(0,game.height-80,game.width,112,'ground').autoScroll(-100,0); //地板
    }
};
(2)标题组:我们可以看到,标题组有标题文字和小鸟,这两者还是动态的,一起上下移动,这里用到的就是Phaser.Group,也就是组。组相当于一个父容器,我们可以把许多对象放进一个组里,然后就可以使用组提供的方法对这些对象进行一个批量或是整体的操作。我们把标题文字和小鸟装进这个组里面,对这个组进行一个整体的操作。
var menuState = {
    create:function () {
        ...

        var titleGroup = game.add.group(); //创建存放标题的组
        titleGroup.create(0,0,'title'); //标题
        var bird = titleGroup.create(190, 10, 'bird'); //添加bird到组里
        bird.animations.add('fly'); //添加动画
        bird.animations.play('fly',12,true); //播放动画
        titleGroup.x = 35;
        titleGroup.y = 100;
        //标题的补间动画,对这个组添加一个tween动画,让它不停的上下移动
        game.add.tween(titleGroup).to({ y:120 },1000,null,true,0,Number.MAX_VALUE,true);
    }
};
(3)按钮:按钮就是给一张图片,然后添加点击事件,点击就开始游戏的场景
var menuState = {
    create:function () {
        ...

        ...

        var btn = game.add.button(game.width/2,game.height/2,'btn',function(){//按钮
            //点击开始main游戏场景
            game.state.start('main');
        });
        btn.anchor.setTo(0.5,0.5);
    }
};
8、游戏场景 这里就是整个游戏的重头戏了,从这里开始就是操作玩游戏的整个过程,都在mainState里面完成,至于每个游戏的小部分,依靠的是里面各个函数体来控制完成
首先,游戏准备部分,游戏还没开始前给出个简易游戏教程指示,这里整体都是静态的: (1)初始化背景 (2)创建用于存放管道的组 (3)开启地面的物理系统,但是先保持地面不移动 (4)开启小鸟的物理系统,但是先保持小鸟不移动 (5)标题头 (6)教程示意图,添加点击事件,点击开始游戏
var mainState = {
    create: function() {
        this.background = game.add.tileSprite(0,0,game.width,game.height, 'background');//背景图

        this.pipeGroup = game.add.group();//用于存放管道的组,后面会讲到
        this.pipeGroup.enableBody = true;

        this.ground = game.add.tileSprite(0,game.height-80,game.width,112,'ground'); //地板
        game.physics.enable(this.ground,Phaser.Physics.ARCADE);//开启地面的物理系统
        this.ground.body.immovable = true; //让地面在物理环境中固定不动

        this.bird = game.add.sprite(50,150,'bird'); //鸟
        game.physics.enable(this.bird,Phaser.Physics.ARCADE); //开启鸟的物理系统
        this.bird.body.gravity.y = 0; //鸟的重力,未开始游戏,先让重力为0,不然鸟会掉下来

        this.readyText = game.add.image(game.width/2, 40, 'ready_text'); //get ready 文字
        this.playTip = game.add.image(game.width/2,300,'play_tip'); //提示点击屏幕的图片
        this.readyText.anchor.setTo(0.5, 0);
        this.playTip.anchor.setTo(0.5, 0);
        //game.time.events.stop(false); //先不要启动时钟
        game.input.onDown.addOnce(this.startGame, this); //点击屏幕后正式开始游戏
    },
}
然后,开始玩游戏 (1)从startGame函数开始,玩游戏的主题函数。让背景和地面开始移动,开启小鸟的重力系统,通过点击屏幕让小鸟起飞,去除准备阶段的标题头和玩法提示图片,管道开始移动,然后显示左上角的得分情况。通过update更新游戏情况
var mainState = {
    create: function() {
        ...
    },

    startGame: function () {
        this.gameSpeed = 200; //游戏速度
        this.background.autoScroll(-(this.gameSpeed/10),0); //让背景开始移动
        this.ground.autoScroll(-this.gameSpeed,0); //让地面开始移动
        // 小鸟
        game.physics.arcade.enable(this.bird);
        this.bird.body.gravity.y = 1000;
        this.readyText.destroy(); //去除 'get ready' 图片
        this.playTip.destroy(); //去除 '玩法提示 图片
        var spaceKey = game.input.keyboard.addKey(
            Phaser.Keyboard.SPACEBAR);
        spaceKey.onDown.add(this.jump, this);

        //管道
        this.pipes = game.add.group();
        //定时器,每1.5秒调用addRowOfPipes
        this.timer = game.time.events.loop(1500, this.addRowOfPipes, this);

        //得分:显示左上角的分数
        this.score = 0;
        this.labelScore = game.add.text(20, 20, "0",
            { font: "30px Arial", fill: "#ffffff" });

        // 改变小鸟旋转的中心点
        this.bird.anchor.setTo(-0.2, 0.5);

        //声音
        this.jumpSound = game.add.audio('jump');
    },
    /**
     * 最后update方法是更新函数,它会在游戏的每一帧都执行,以此来创造一个动态的游戏
     */
    update: function() {
        // 小鸟超过范围区域则重新开始游戏
        if (this.bird.y < 0 || this.bird.y > 490)
            this.restartGame();

        //小鸟慢慢向下旋转,直到某个点
        if (this.bird.angle < 20)
            this.bird.angle += 1;

        //当鸟死亡时,重新开始游戏
        //game.physics.arcade.overlap(this.bird, this.pipes, this.restartGame, null, this);
        //当鸟死亡时,从屏幕上掉下来
        game.physics.arcade.overlap(this.bird, this.pipes, this.hitPipe, null, this);
    },
(2)jump函数:点击屏幕控制小鸟飞翔状态
jump: function() {
        //在死亡时不能够让鸟跳跃
        if (this.bird.alive == false)
            return;
        // 点击屏幕小鸟的重力系数变为负数,便可起飞
        this.bird.body.velocity.y = -350;

        //小鸟往上跳的时候,它向上旋转
        game.add.tween(this.bird).to({angle: -20}, 100).start();

        //小鸟起飞的音效
        this.jumpSound.play();
    },
(3)管道组:建立管道和管道组,通过startGame添加定时器控制管道定时生成和移动。然后这边还有个分数计算,这里设定就是每生成一个管道就加一分。
addOnePipe: function(x, y) {
        var pipe = game.add.sprite(x, y, 'pipe');
        this.pipes.add(pipe);
        game.physics.arcade.enable(pipe);
        pipe.body.velocity.x = -200;

        pipe.checkWorldBounds = true;
        pipe.outOfBoundsKill = true;
    },

    addRowOfPipes: function() {
        // Randomly pick a number between 1 and 5
        // This will be the hole position
        var hole = Math.floor(Math.random() * 5) + 1;

        // Add the 6 pipes
        // With one big hole at position 'hole' and 'hole + 1'
        for (var i = 0; i < 8; i++)
            if (i != hole && i != hole + 1)
                this.addOnePipe(285, i * 60 + 10);

        //每创建一个新管子就把分数加1
        this.score += 1;
        this.labelScore.text = this.score;
    },
(3)接下来,就是判断小鸟撞击管道的时候死亡了
hitPipe: function() {
        // If the bird has already hit a pipe, do nothing
        // It means the bird is already falling off the screen
        if (this.bird.alive == false)
            return;

        // Set the alive property of the bird to false
        this.bird.alive = false;

        // Prevent new pipes from appearing
        game.time.events.remove(this.timer);

        // Go through all the pipes, and stop their movement
        this.pipes.forEach(function(p){
            p.body.velocity.x = 0;
        }, this);
    }
(4)最后,就是当小鸟各种死亡后,就是游戏结束了,这时候需要启动重新开始游戏的设定。设定跳转菜单页面。
// 重新开始游戏
    restartGame: function() {
        game.state.start('menu');
    },
到这里就结束啦,有兴趣就去github上fork我的代码也行哦!